Football season has started! That means lots of DIY Saints gear! This Sunday, The Mercedes-Benz Superdome will host their first game of the season. Make your own DIY t-shirts to the game and cheer on the SAINTS!
There are tons of great Saints merchandise to buy, but if you want something one-of-a-kind and original, you will have to make it yourself! This post will show you 3 different ways to make t shirts. Each t-shirt is sew-free, stress-free and cost under $10 to make! The hardest part of any of these t-shirts is coming up with your own design.
T-Shirt 1 - Stencil
What you will need:- Freezer paper
- X-acto knife
- Printer
- Iron
- Acrylic paint
- Textile medium
- Foam brush
- Tape
- Pencil
- Washed t shirt
I decided to go with a design that features the NOLA skyline. I started off by printing a photo of the skyline I found from Google Images. After printing, you will have to trace your design onto freezer paper.
Trace the skyline by putting a light source under a glass table. You will then be able to see through the freezer paper and easily trace.
Be sure to tape edges so that the paper doesn't move around.
I traced with a pencil
After you figure out your design, Use an x-acto knife to cut it out. Remember that all the pieces that you cut out will be the areas that will be painted.
This is my finished design.
Iron your t shirt so that there are no wrinkles
On medium heat, iron the freezer paper to the t shirt.
If you have wording in your design, you can add details after the initial ironing.
After everything is ironed, it is ready for paint!! Slide a piece of cardboard inside the t shirt so that paint doesn't seep through and ruin the back. Mix 1 part acrylic paint to 2 parts textile medium. Use a foam brush to blot on the paint.
You might need a couple coats of paint, if you want the paint to look solid.
Before the paint drys, carefully peal off the freezer paper. This is the most exciting part!
LOVE IT!
T-Shirt 2 - Iron-On Fabric Design
What you will need:
- Iron-on adhesive (no sew)
- 1/4 yard of fabric
- T shirt
- Printer
- Scissors
- Iron
- X-acto knife
Supplies
Lay your fabric print side down. Iron on the adhesive- 2 second iron time.
Pin your printed deign on top of the fabric/adhesive
Use an x-acto knife to cut out your design.
I used the Saints logo for this design.
All cut out.
Peel the protective coating off the back of the adhesive.
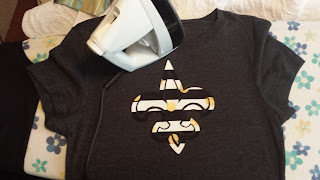
Iron it onto the t-shirt. 8 second iron time


T-Shirt 3 - Iron-On Glitter T-Shirt
What you will need:
- Iron-on transfer sheet
- Printer
- X-acto knife
- T-shirt
- Pillow case
Print out your design. I made mine on MS Publisher, but you can also hand draw a design.
Cut out.
Use a sharpie to trace the design onto the glitter transfer sheet
Use an x-acto knife to cut out the design
Iron out your t-shirt and figure out where you want the transfer sheet to be ironed.
Put a pillow case over the transfer and t-shirt and iron for 40 seconds on medium heat.
Voila!!


No comments:
Post a Comment